
Here's a very brief overview of some of the steps involved in the lost wax casting process. The Applied Arts course at North Wales School of Art & Design is really hands on with teaching and practising important processes like this. Their focus is "on the high quality craft skills needed to be a professional maker".

Spruing-up with thin rods of wax makes a tree like structure which will allows the molten metal to flow into and fill the cavities.
"Spruing Up"
Taking your organic found objects or wax shapes you have made, you have to connect them to a wax tree with little wax branches called "Sprues" all pointing "Up" so that when turned upside down the metal flows down into the spaces left after the wax melts. You want the sprues to be as thin and delicate as possible when working on small scale castings as they will also be "transformed" into solid metal and you will have to cut them off where they are attached and clean up your castings. This makes "spruing up" quite fiddly and takes longer than you think! You need a steady hand and plenty of concentration when melting and applying the wax sprues.
When your tree is finished and all the parts are secure it is fitted inside a flask. Next is a crazy process which is all about precision and timing!
Plaster
You have to mix up a bucket of special investment plaster, carefully weighing up the quantities, making sure everything is clean and uncontaminated. The plaster starts to harden very quickly so processes need to be followed really carefully and quickly, so just like a TV chef you need to know the "recipe" inside out and have all of your things weighed out and everything to hand. However, instead of putting your "mixture" in the shiny oven in your glamorous chef's kitchen, the flask of plaster goes into a vacuum chamber to get rid of the air and ensures crisply defined castings. After the specified time in the vacuum, the flask goes into the kiln overnight. This will burn away the wax and organic materials leaving the cavity to then fill with molten metal.

Casting Day
Now you can prepare your casting metals. These have to be weighed out depending on the weight of the flask and how big the castings are going to be. Accurate measurements are really important. If too little metal is melted then when it's poured in, it won't fill out the cavities, meaning your one-off castings will be sad and empty or partially missing spoiling your hard work from the previous day!

Casting grains of silver go into the crucible to melt ready to pour into the mould.

Lovely brass for brass castings.

Brass scrap in the crucible

You can see the chopped up "sprue-trees" leftover from a previous casting to be melted and reused in this casting.

Working with hot metal is dangerous, so safety equipment and the right tools are needed to protect yourself and those around. And maybe a nice cold drink for afterwards, as it does get VERY hot!
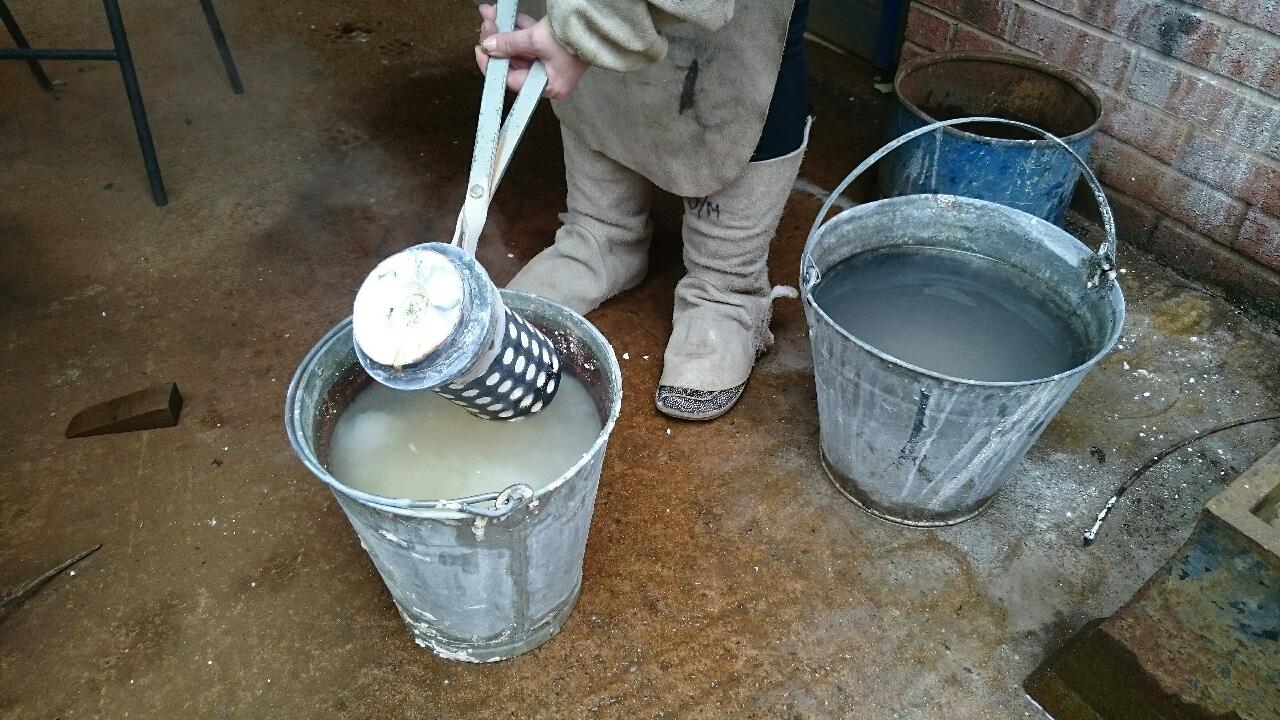
When ready (again, timing is everything so follow instructions and have accurate timers), the flask is plunged into a bucket of water. This causes the special plaster to fizz and bubble dramatically like a volcanic geyser so it's very exciting!
This reaction means that the plaster should dissolve and break away leaving the metal casting to be cleaned up.
It's like excavating your own fossils!


Silver casting of wax rings by my sister Julie Mellor.

Brass casting of plant stems collected by my sister Rozanne Mellor.
Now the castings can be sawn-off by hand, cleaned up and transformed into whatever you have planned for them! I hope this shows what an exciting and involved process casting is! For more information on the facilities, Open Days and courses at North Wales School of Art & Design at Glyndwr University check out their website or message them on Twitter: @NWSADAppliedArt .